Kostenloses SSL-Zertifikat mit Let’s Encrypt – Teil 2: Zertifikate mit Certbot automatisch installieren
Im zweiten Teil meiner Artikelserie zu Let's Encrypt zeige ich euch heute den Certbot.
Certbot ist ein Open-Source-Programm, das automatisch Zertifikate von Let's Encrypt abruft und verwaltet. Certbot kann nicht nur die Zertifikate abrufen, sondern auch vollautomatisch in die Webserver-Konfiguration einfügen.
In dieser Anleitung verwende ich Ubuntu 18 und den Apache-Webserver. Ich richte eine kleine
Demo-Seite unter demo.thehacker.biz ein, die wir anschließend mit einem SSL-Zertifikat ausrüsten.
Hier meine Apache-Konfiguration:
<VirtualHost *:80>
        ServerName demo.thehacker.biz
        DocumentRoot /srv/demo.thehacker.biz

        <Directory /srv/demo.thehacker.biz>
                Require all granted
        </Directory>
</VirtualHost>
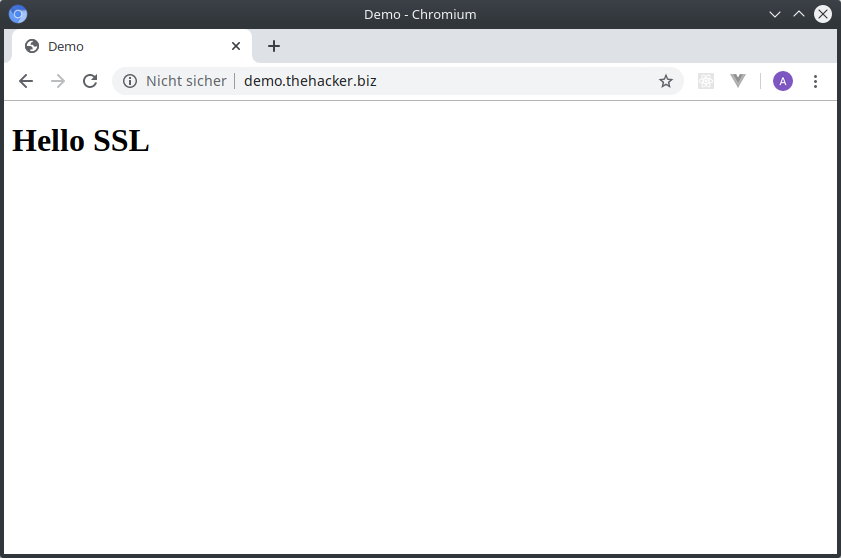
Ich habe unter /srv/demo.thehacker.biz/index.html eine HTML-Seite mit nur einer Überschrift
angelegt, damit wir was sehen können. In der Adresszeile des Browsers sehen wir das altbekannte
"Nicht sicher".
Certbot installieren
Für SSL installieren wir nun zu allererst den Certbot. Certbot ist in vielen Linux-Distributionen
bereits enthalten und somit einfach über die Paketverwaltung zu installieren. Wir installieren
das Paket certbot und für unseren Webserver das passende Plugin python-certbot-apache mit.
root@demo:~# apt install certbot python-certbot-apache
Certbot nutzen
Wir rufen nun den Certbot auf. Er wird die Apache-Konfiguration automatisch auslesen und alle verfügbaren Domains ausgeben, für die wir SSL-Zertifikate installieren können. Wir wählen unsere Demo-Domain aus.
Certbot wird nun eine Anfrage an die Zertifizierungsstelle stellen, die mit einer Challenge antwortet. Nur der Besitzer der angefragten Domain kann die Challenge lösen. Certbot konfiguriert danach den Webserver um, um die Challenge zu bewerkstelligen. Er wird dafür sorgen, dass ein bestimmter Inhalt auf einer bestimmten URL unter der Domain sichtbar ist. Dies ist der Beweis, dass die Domain wirklich uns gehört. Nachdem die Zertifizierungsstelle die Challenge als gelöst ansieht, stellt sie das Zertifikat zur Verfügung. Certbot lädt es herunter und installiert es, indem voll automatisch die Apache-Konfiguration umgeschrieben wird. Am Ende fragt uns Certbot, ob wir automatisch von HTTP auf HTTPS umleiten wollen, damit grundsätzlich nur verschlüsselte Verbindungen zur Webseite möglich sind. All das dauert nur wenige Sekunden.
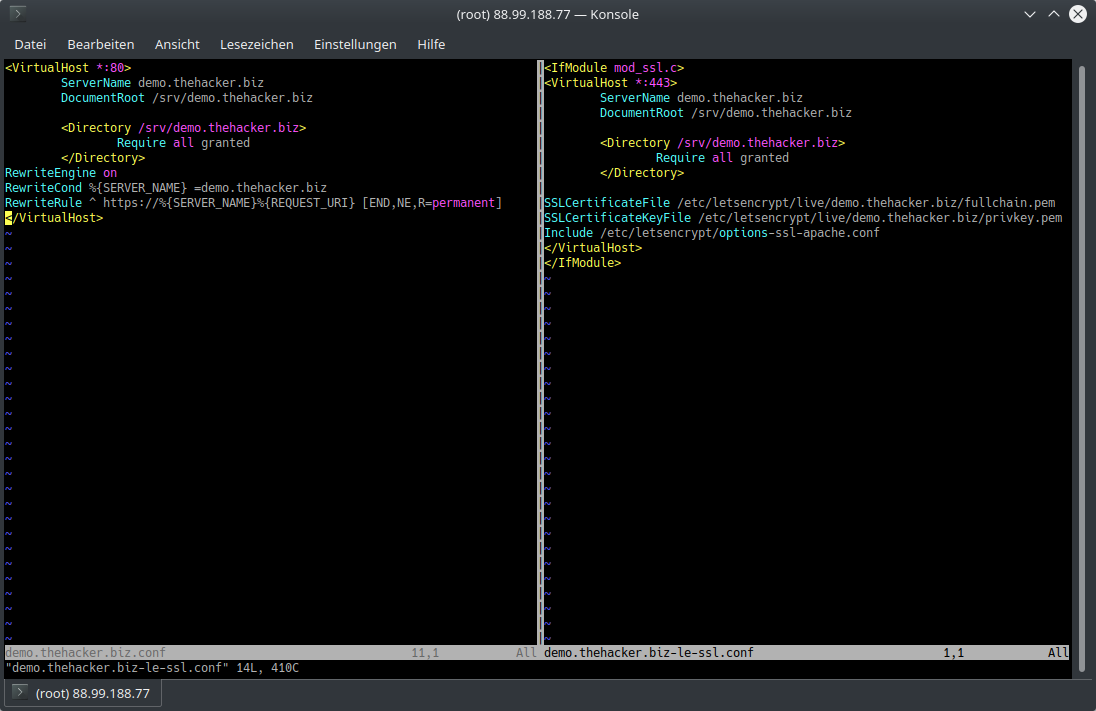
Vorsicht: Certbot ändert die Apache-Konfiguration vollautomatisch! Am Ende sollte man vorsichtshalber alles nochmal kontrollieren. Bis jetzt hatte ich noch keine Probleme. Als jemand, der seine Konfiguration ordentlich einrückt und ggf. mit Kommentare versieht, musste ich danach allerdings noch etwas nacharbeiten
So sieht der Aufruf von certbot aus:
root@demo-thehacker-biz:~# certbot
Saving debug log to /var/log/letsencrypt/letsencrypt.log
Plugins selected: Authenticator apache, Installer apache
Enter email address (used for urgent renewal and security notices) (Enter 'c' to
cancel): certbot@demo.thehacker.biz

- - - - - - - - - - - - - - - - - - - - - - - - - - - - - - - - - - - - - - - -
Please read the Terms of Service at
https://letsencrypt.org/documents/LE-SA-v1.2-November-15-2017.pdf. You must
agree in order to register with the ACME server at
https://acme-v02.api.letsencrypt.org/directory
- - - - - - - - - - - - - - - - - - - - - - - - - - - - - - - - - - - - - - - -
(A)gree/(C)ancel: a

- - - - - - - - - - - - - - - - - - - - - - - - - - - - - - - - - - - - - - - -
Would you be willing to share your email address with the Electronic Frontier
Foundation, a founding partner of the Let's Encrypt project and the non-profit
organization that develops Certbot? We'd like to send you email about our work
encrypting the web, EFF news, campaigns, and ways to support digital freedom.
- - - - - - - - - - - - - - - - - - - - - - - - - - - - - - - - - - - - - - - -
(Y)es/(N)o: n

Which names would you like to activate HTTPS for?
- - - - - - - - - - - - - - - - - - - - - - - - - - - - - - - - - - - - - - - -
1: demo.thehacker.biz
- - - - - - - - - - - - - - - - - - - - - - - - - - - - - - - - - - - - - - - -
Select the appropriate numbers separated by commas and/or spaces, or leave input
blank to select all options shown (Enter 'c' to cancel): 1
Obtaining a new certificate
Performing the following challenges:
http-01 challenge for demo.thehacker.biz
Enabled Apache rewrite module
Waiting for verification...
Cleaning up challenges
Created an SSL vhost at /etc/apache2/sites-available/demo.thehacker.biz-le-ssl.conf
Enabled Apache socache_shmcb module
Enabled Apache ssl module
Deploying Certificate to VirtualHost /etc/apache2/sites-available/demo.thehacker.biz-le-ssl.conf
Enabling available site: /etc/apache2/sites-available/demo.thehacker.biz-le-ssl.conf

Please choose whether or not to redirect HTTP traffic to HTTPS, removing HTTP access.
- - - - - - - - - - - - - - - - - - - - - - - - - - - - - - - - - - - - - - - -
1: No redirect - Make no further changes to the webserver configuration.
2: Redirect - Make all requests redirect to secure HTTPS access. Choose this for
new sites, or if you're confident your site works on HTTPS. You can undo this
change by editing your web server's configuration.
- - - - - - - - - - - - - - - - - - - - - - - - - - - - - - - - - - - - - - - -
Select the appropriate number [1-2] then [enter] (press 'c' to cancel): 2
Enabled Apache rewrite module
Redirecting vhost in /etc/apache2/sites-enabled/demo.thehacker.biz.conf to ssl vhost in /etc/apache2/sites-available/demo.thehacker.biz-le-ssl.conf

- - - - - - - - - - - - - - - - - - - - - - - - - - - - - - - - - - - - - - - -
Congratulations! You have successfully enabled https://demo.thehacker.biz

You should test your configuration at:
https://www.ssllabs.com/ssltest/analyze.html?d=demo.thehacker.biz
- - - - - - - - - - - - - - - - - - - - - - - - - - - - - - - - - - - - - - - -

IMPORTANT NOTES:
 - Congratulations! Your certificate and chain have been saved at:
   /etc/letsencrypt/live/demo.thehacker.biz/fullchain.pem
   Your key file has been saved at:
   /etc/letsencrypt/live/demo.thehacker.biz/privkey.pem
   Your cert will expire on 2020-03-11. To obtain a new or tweaked
   version of this certificate in the future, simply run certbot again
   with the "certonly" option. To non-interactively renew *all* of
   your certificates, run "certbot renew"
 - Your account credentials have been saved in your Certbot
   configuration directory at /etc/letsencrypt. You should make a
   secure backup of this folder now. This configuration directory will
   also contain certificates and private keys obtained by Certbot so
   making regular backups of this folder is ideal.
 - If you like Certbot, please consider supporting our work by:

   Donating to ISRG / Let's Encrypt:   https://letsencrypt.org/donate
   Donating to EFF:                    https://eff.org/donate-le
Certbot lädt selbstständig das SSL-Modul für den Apache – falls noch nicht aktiviert – und führt am Ende einen Reload der Apache-Konfiguration durch. Das war's auch schon.
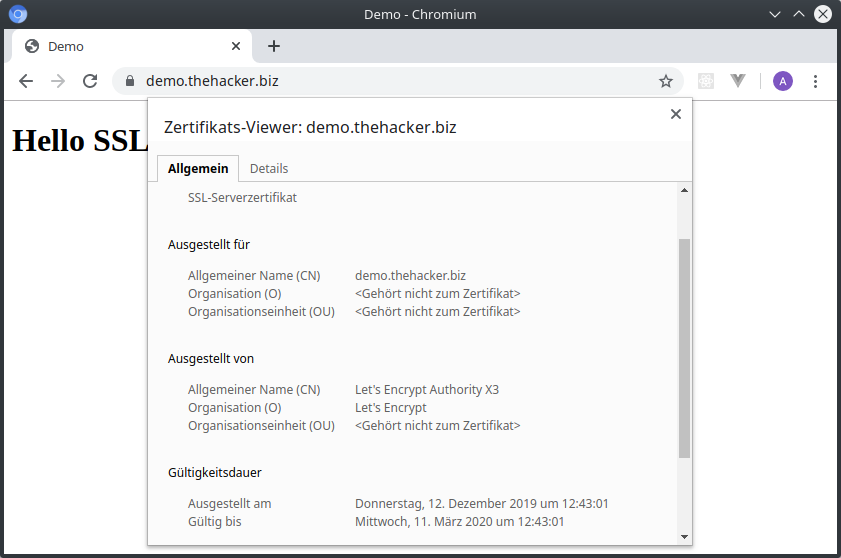
Drücken wir im Browser einmal auf F5, um die Seite zu aktualisieren, werden wir automatisch auf die https-Seite umgeleitet. In der Browser-Adresszeile ist das Schloss-Symbol sichtbar. Klicken wir es an und gehen auf "Zertifikat", sehen wir die Details unseres "Let's Encrypt"-Zertifikats.
Zertifikat-Erneuerung
Alle Zertifikate von Let's Encrypt werden mit einer Gültigkeit von 90 Tagen erstellt. Daran gibt es nichts zu rütteln. Wir müssen also rechtzeitig vorher das Zertifikat erneuern.
Zum Glück übernimmt Certbot hier auch alles. Die Certbot-Pakete der Linux-Distribution haben bei der Installation bereits Einträge in die Crontab gemacht. Certbot wird vollautomatisch, wenn die Zertifikate langsam ablaufen, eine Verlängerung bei der Zertifizierungsstelle beanttragen. Wir müssen also nichts mehr tun :-)
Im nächsten Teil dieser Artikelserie zeige ich euch, wie ihr Certbot manuell aufrufen könnt. Das ist z. B. dann nützlich, wenn er eine komplizierte Apache-Konfiguration nicht versteht oder ihr nur ein Zertifikat abrufen wollt, ohne es zu installieren.


Kommentare zu diesem Artikel
Schreib einen Kommentar zum Artikel
Vielen Dank für deinen Kommentar! :-)
Da alle Kommentare von Hand bearbeitet werden,
gedulde dich bitte, bis der Kommentar freigeschaltet wird.
Formular nicht richtig ausgefüllt.
Oops... da ist was schiefgelaufen :-(
Dein Kommentar konnte nicht gespeichert werden.
Bitte probier es später nochmal.